Popcorn, acoustic, or stucco? No matter how you refer to these textured ceilings, all you need to know is that they are out. A trend of the mid to late 20th century, popcorn ceilings are a marker of homes built during this period. The blotchy treatment’s popularity with builders wasn’t about attractiveness; its ability to absorb sound, hide imperfections, and cost-effectiveness (no painting required) made it an ideal choice. Now, they’re considered interior design faux pas that date your home, regardless of how contemporary your decor is. Surprisingly, with just a few steps, you can take your home’s ceilings from antique to modern.
If you’re staring up above and wondering how to get rid of these outdated dust catchers, Home & Texture has you covered. Removing popcorn ceilings from your home is much simpler than it looks.

Test for Asbestos
Asbestos may be present in some older buildings. People commonly used this mineral fiber in insulation, drywall, and other materials until the U.S. government banned it in these products in 1977.
You’ll need to test for asbestos if your home was built before then or a few years later. You can buy an Asbestos DIY test kit or have a licensed professional come out and test. If the test is positive, you shouldn’t do the removal yourself. Instead, you can leave the previous ceiling intact and cover it in drywall or paneling.
Gather Materials and Tools
Before removing your popcorn ceiling, you should take a shopping trip to grab the necessary tools and materials. Here’s a checklist of what you need:
- Safety goggles
- Dust mask
- Ladder
- Plastic sheeting
- Drop cloth and tarp
- Garden sprayer
- Painter’s tape
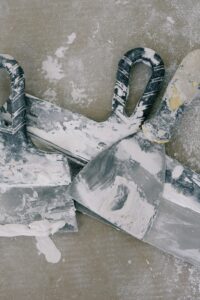
- Paint scraper
- Primer
- Paint
Prep Walls, Floors, and Furniture
Next, you’ll want to prepare your home for renovation by protecting everything beneath and around your work area.
- Remove furniture. If you can’t, cover furniture with a tarp to save it from damage and debris. Move small items to another space to avoid bumping into anything and knocking it over.
- Turn off your heating and cooling system.
- Take down ceiling fans and light fixtures. Cover the electrical wires with painter’s tape.
- Use painter’s tape to secure your drop cloths to the floor.
- Power off the electricity in the room.
- Apply plastic sheeting to your walls to cover them. If you have wall art, do this with extra care.
- Open windows to ventilate the space.
How To Remove the Popcorn Ceiling
Once you’ve prepared the room, it’s time to get started.
Safety first: Wear your safety gear before picking up your tools. Remember, you’ll move your ladder around a lot, so ensure the area is clear to avoid injury.
While you can scrape the ceiling when dry, applying water helps moisten the spot for easier removal. You want to work in small sections, wetting each area with the garden sprayer. Be sure only to dampen the ceiling; soaking it will destroy the drywall underneath. Wait about 15 minutes before scraping.
Scrape each area gently until the texture is gone. If you’re too rough, you could gouge the ceiling. Occasionally, your scraping tool of choice could be too sharp. In this case, file it to smooth the sides. Difficult areas may need a second spray and pass. Don’t expect to finish in a day, and take breaks as needed.
Once you’ve removed the textured speckles, you might discover the previously concealed flaws in the ceilings, such as visible nails and screws. Or perhaps you’ve accidentally gouged the ceiling, and now you need to fix it. Repair these blemishes with joint compound and allow it to dry before sanding.
After sanding, prime and slap on a fresh coat of paint. Voila! Your ceiling appears brand new.
popular posts
Spaces
Whether it’s luxury or ease, every area of your home should be as fabulous and unique as you.
FOLLOW ALONG ON INSTAGRAM
#homeandtexture
Find us on social for more home inspiration where culture, personal style, and sophisticated shopping intersect to help you create a home where you love to live.


